
Upload VOD
Upload VOD is the VOD directly registered by the client through Content > VOD > **Create VOD**. There are various functions related to VOD, such as opening VOD to the public at a scheduled time, setting highlights, and setting previews.
Creating VOD - Upload VOD
Click the Saucelive Admin > Content > VOD > Create VOD button and enter information on the screen below.
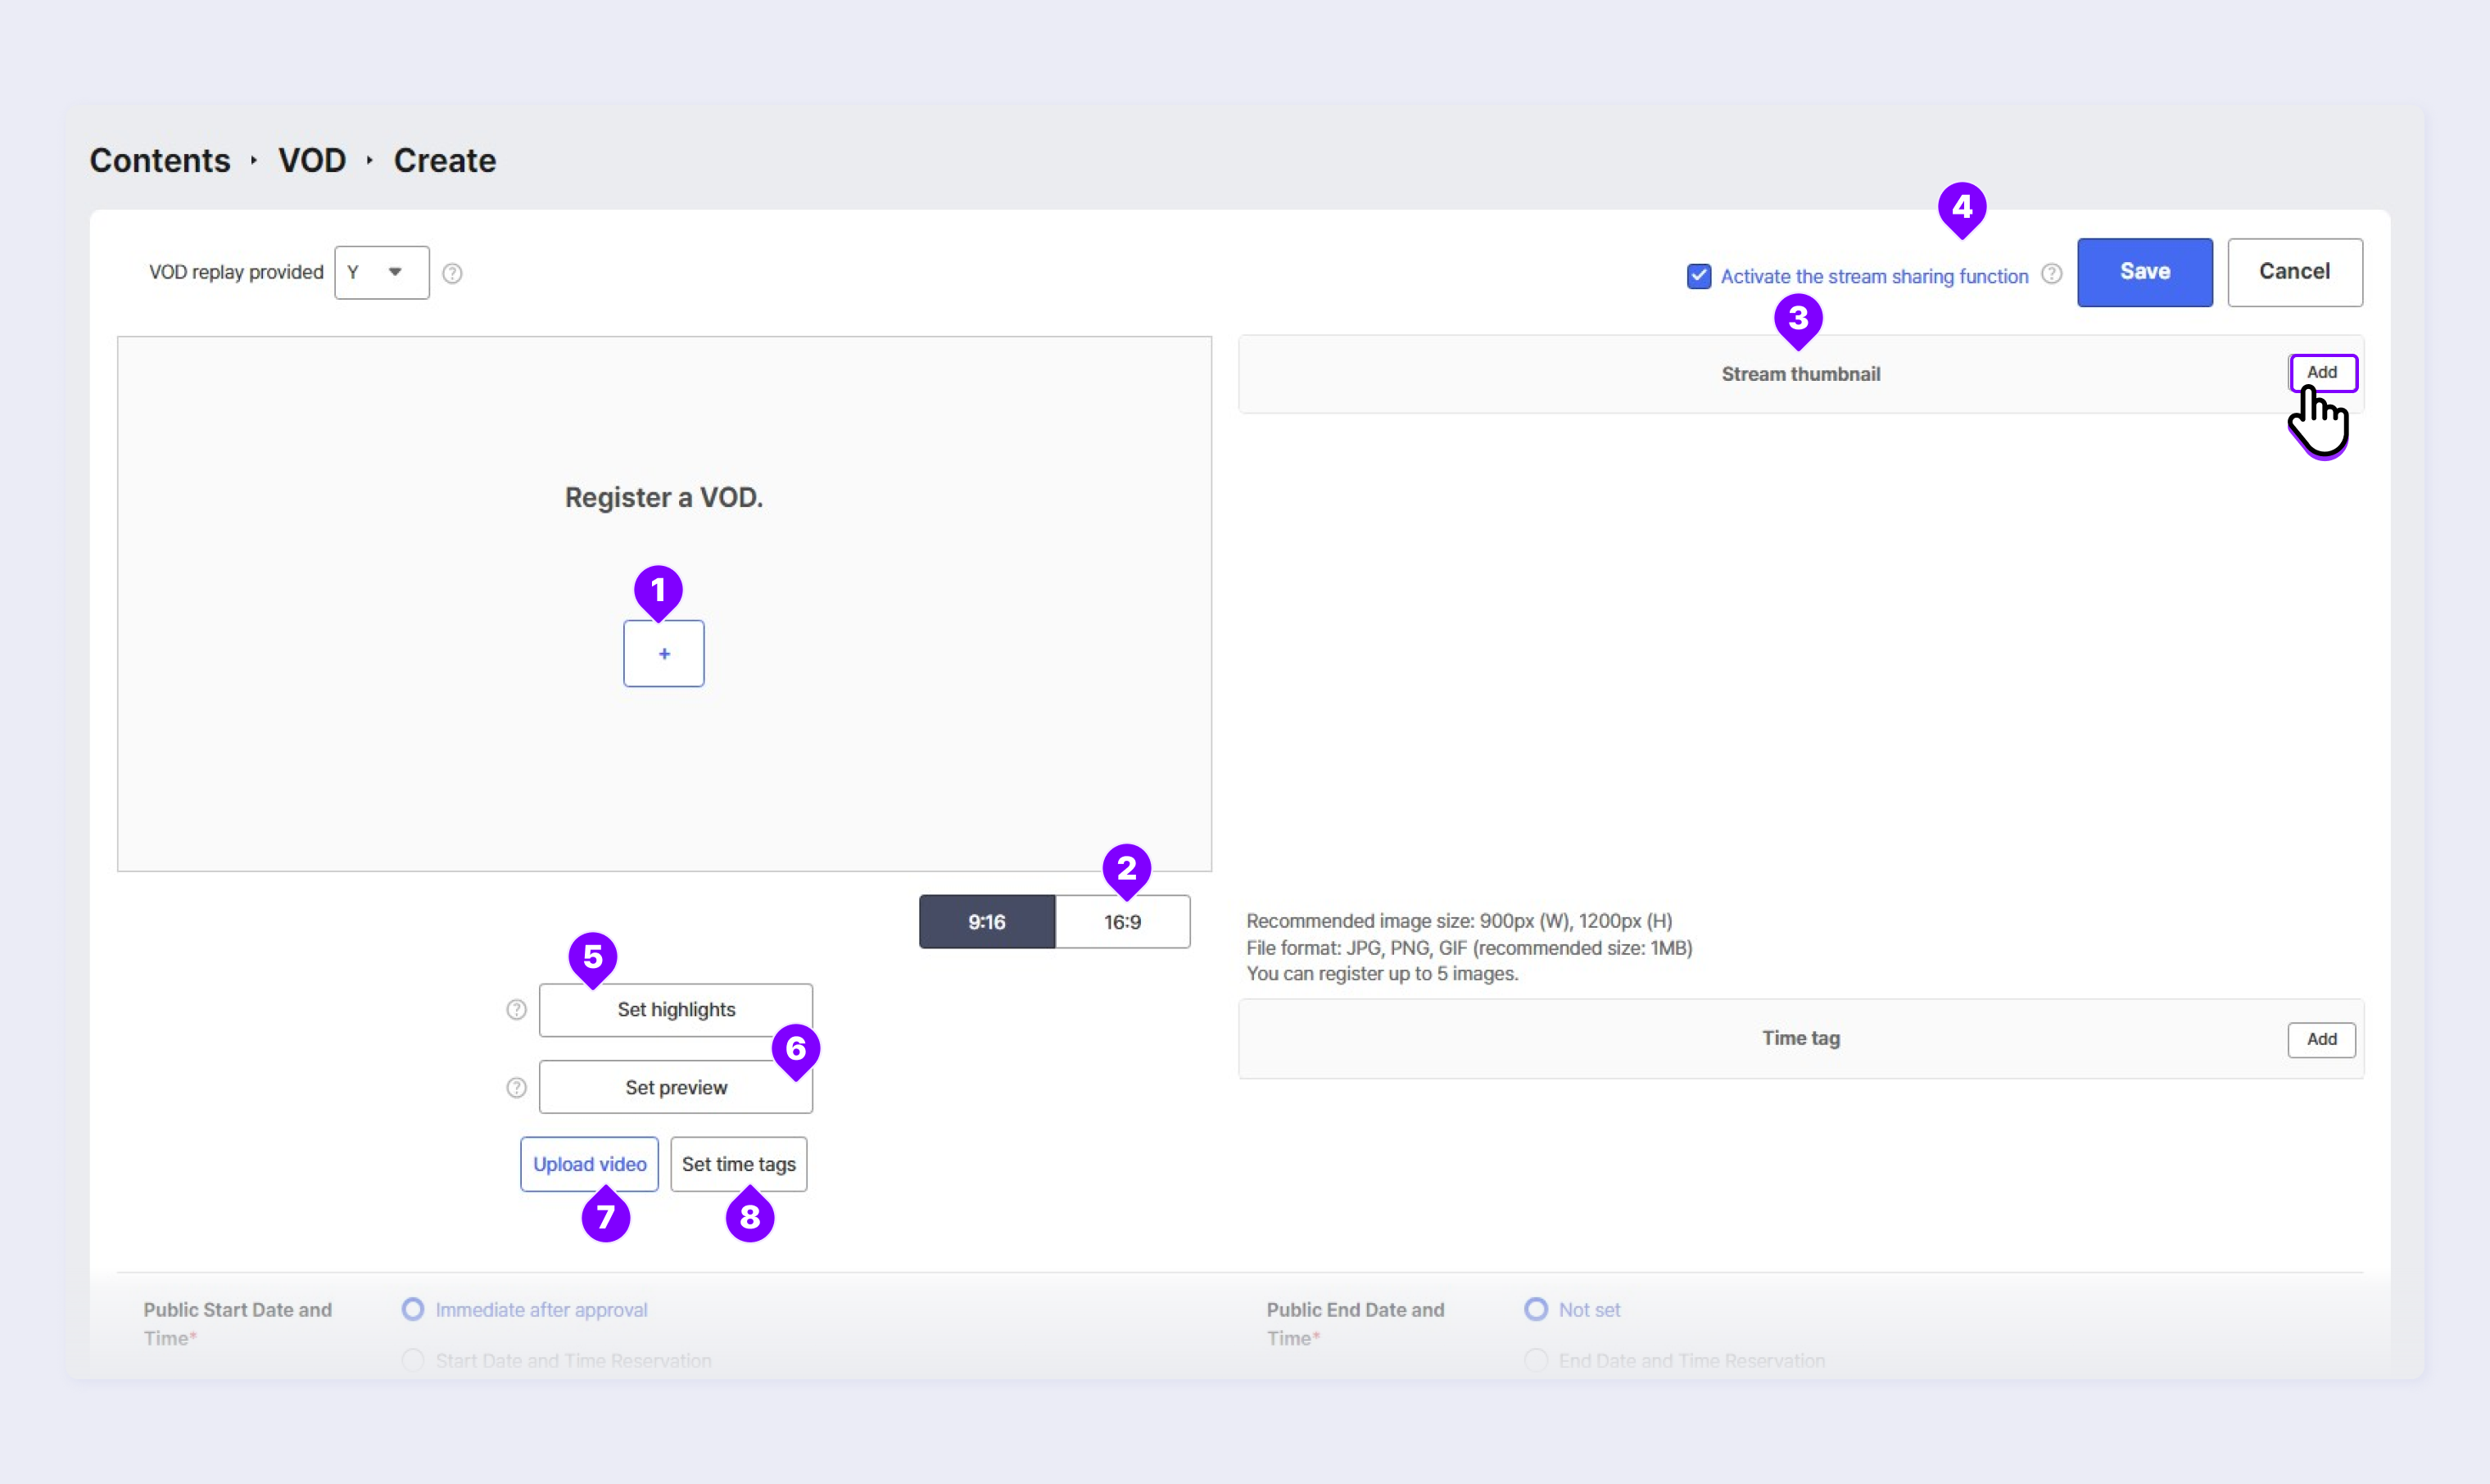
① + (Register)
Click the icon and select the video file to upload. You can upload up to 2 GB.
② Select aspect ratio
Check if the video to upload is in landscape mode (16:9) or portrait mode (9:16) before selecting.
If you want to upload a video in landscape mode as VOD, select the aspect ratio in 2) Select Aspect Ratio first and click the 1) Register button to upload the video.
③ Stream Thumnail
These are images to be shown on the Collection screen. Click the Add button to register. Recommended image standards (3:4 ratio).
- (Minimum) 600 px wide, 800 px high/ (Recommended) 900 px wide, 1200 px high
- Recommended capacity of 1 MB at most (can register up to 5 images)
④ Sharing Function
When checked, an icon for sharing the VOD link is created. This function is checked by default. If not checked, the Sharing Link icon is not displayed.
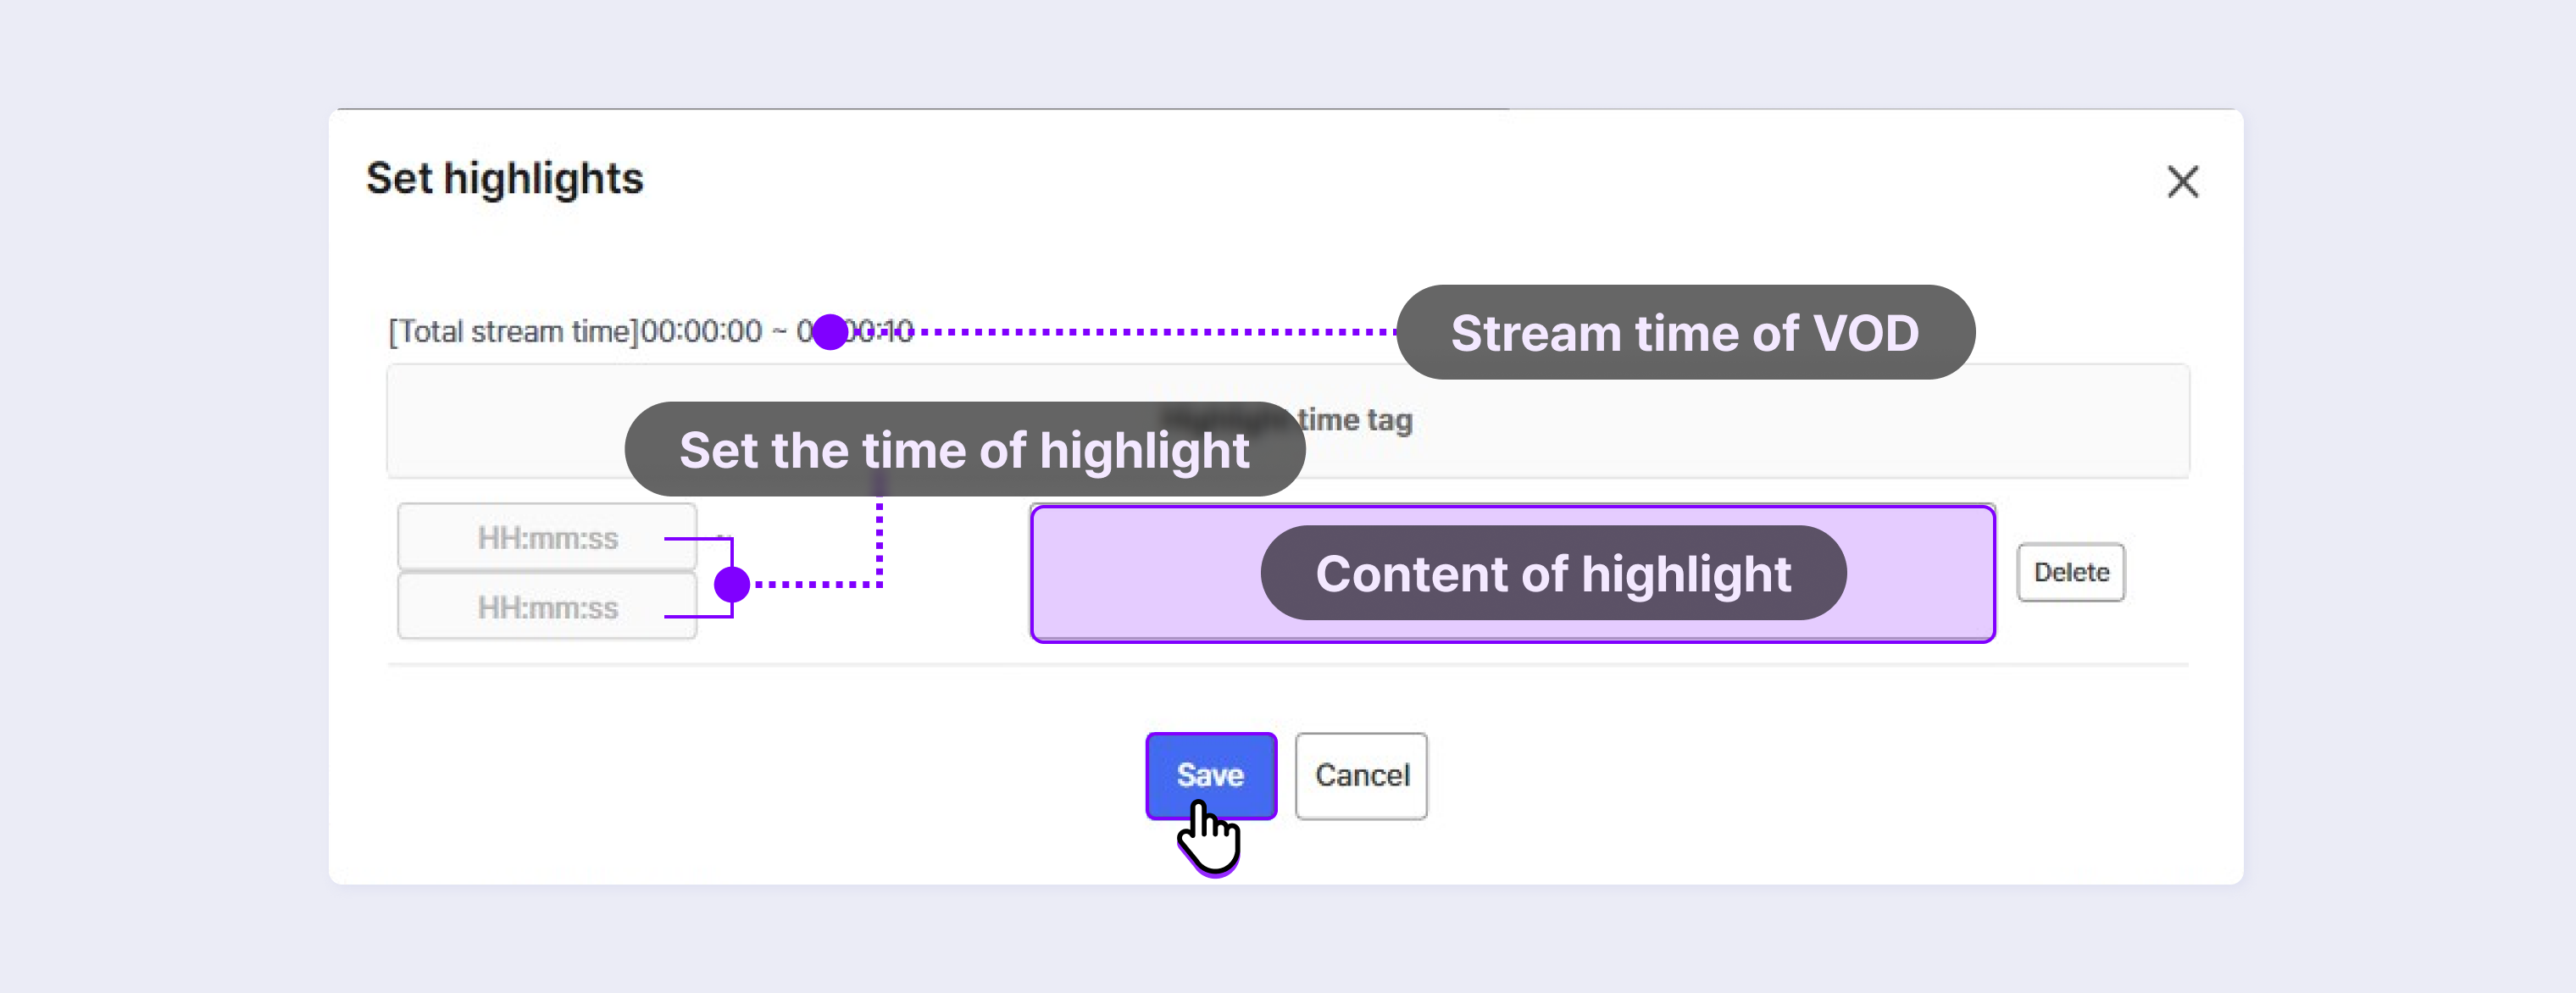
⑤ Set Highlight
- This function allows viewers to watch only the sections they want in VOD. Even if the highlight section is set, viewers can choose to play the full section in the player.
- Click Set Highlight and enter the time of the desired section and details of the highlight in a popup window as below.
- When you click the Delete button, the set highlight is deleted.
- If the highlight is not set, full VOD is played.
- Viewers can select View Full Video or View Highlight Video through the View More icon (…) as below.
- The playback time on the playback bar is adjusted according to the selected view mode (View Full Video or View Highlight Video).

⑥ Set preview
- Automatically play the set preview video on the Collection site screen of the client.
- If the preview is not set separately, the automatically created preview is shown.
- To set a preview, set the desired time section in a Set Preview popup window. You can set the preview time for 5-10 seconds.
- If you click the Reset button, the set time resets to 00:00:00.

⑦ Upload Video
Click to register a video.
⑧ Set Time Tag
This function allows viewers to easily view tags in VOD by setting tags on the video at a specific time or when featuring a specific product. Clicking this creates a popup below.
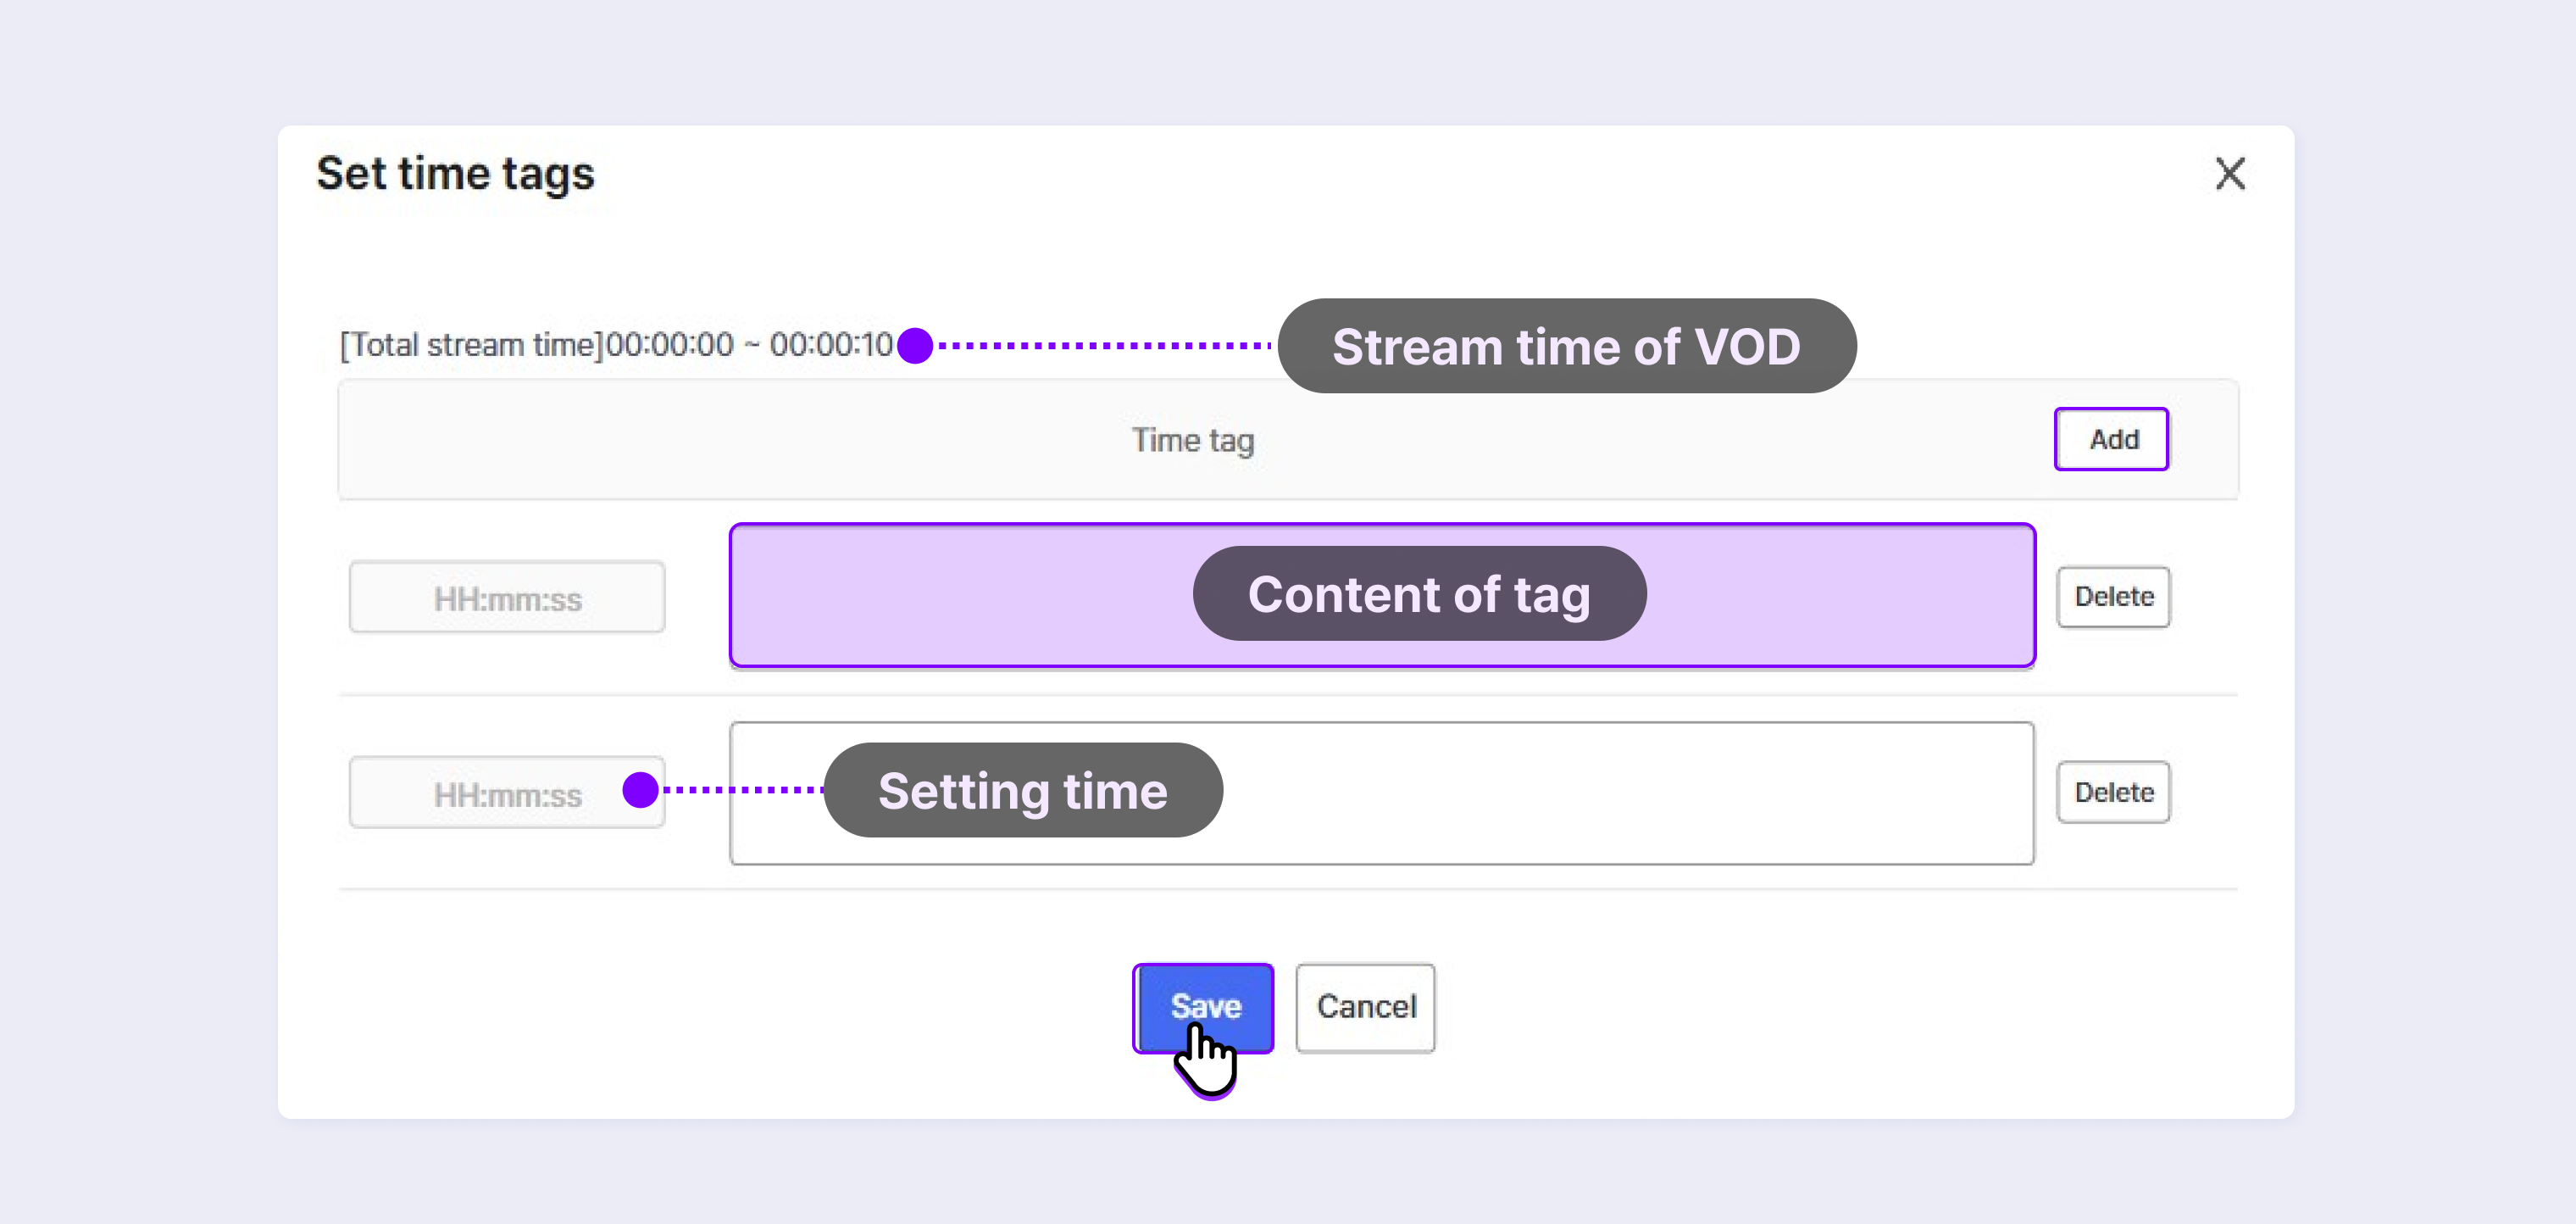
Enter the time (HH:MM:SS) and text to be entered in the tag and click Save. Click the Add button to register up to 10 tags.
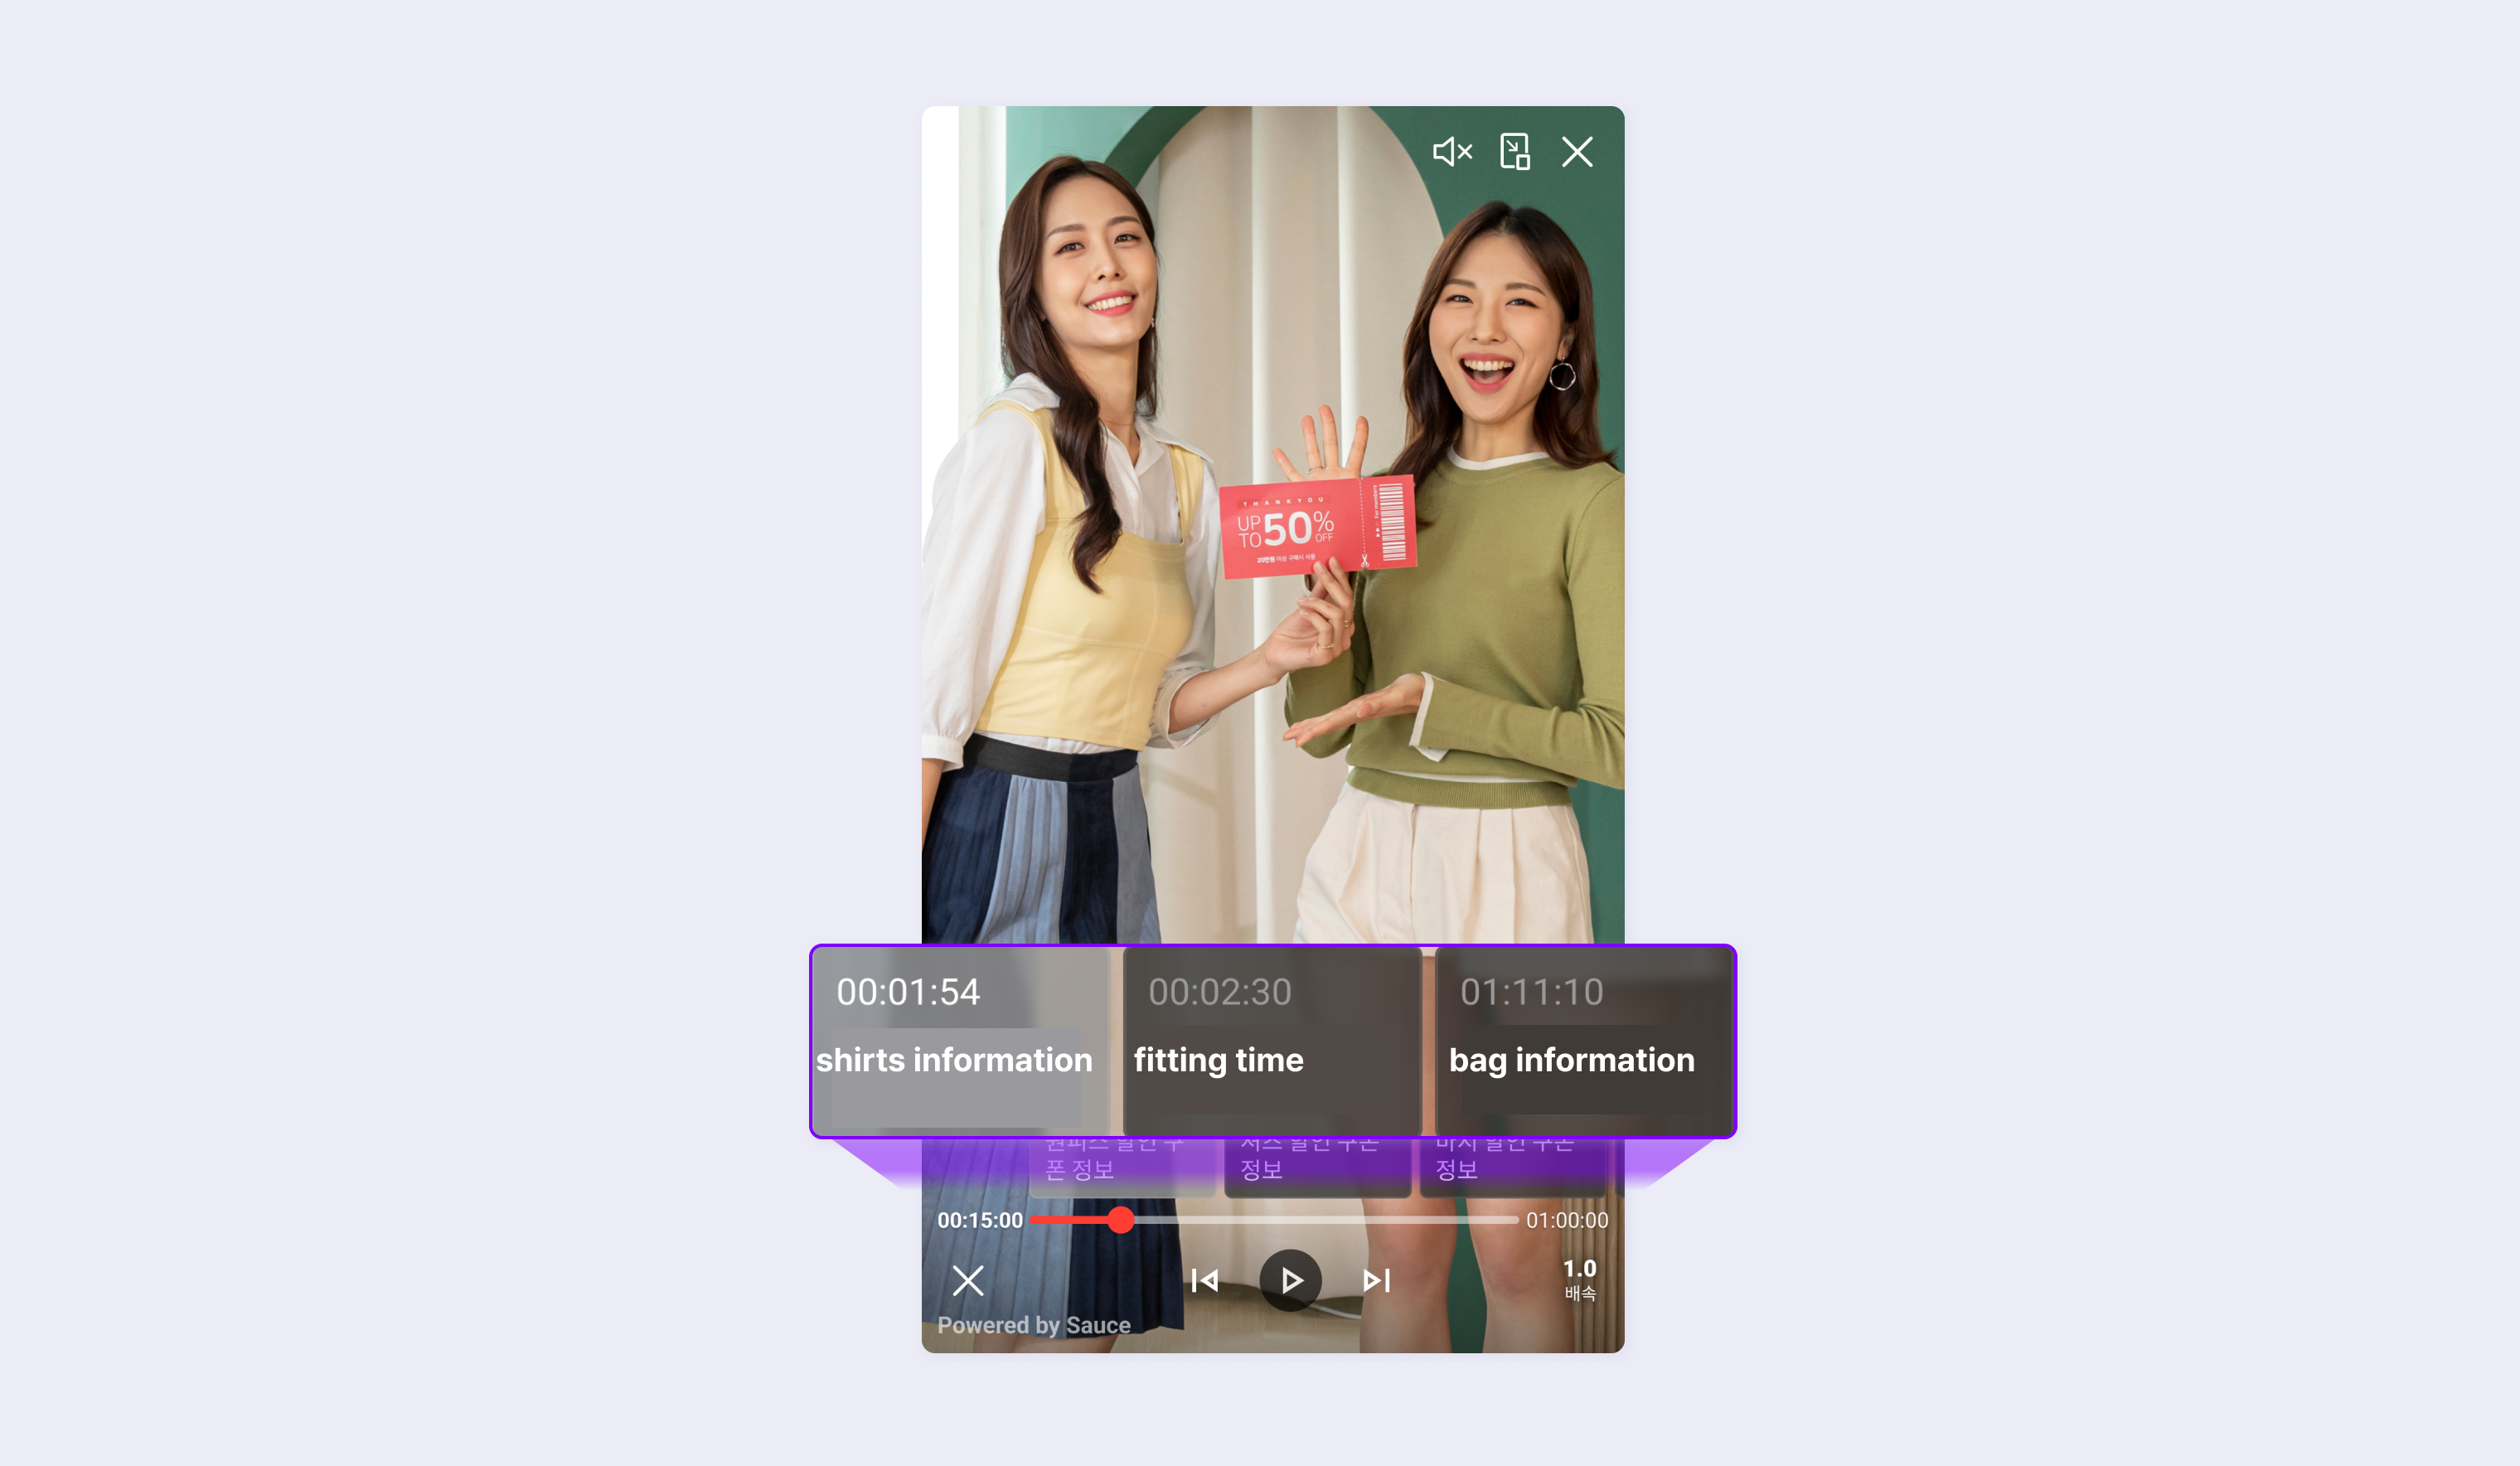
Example screen
Registering Details
Enter additional details as below.
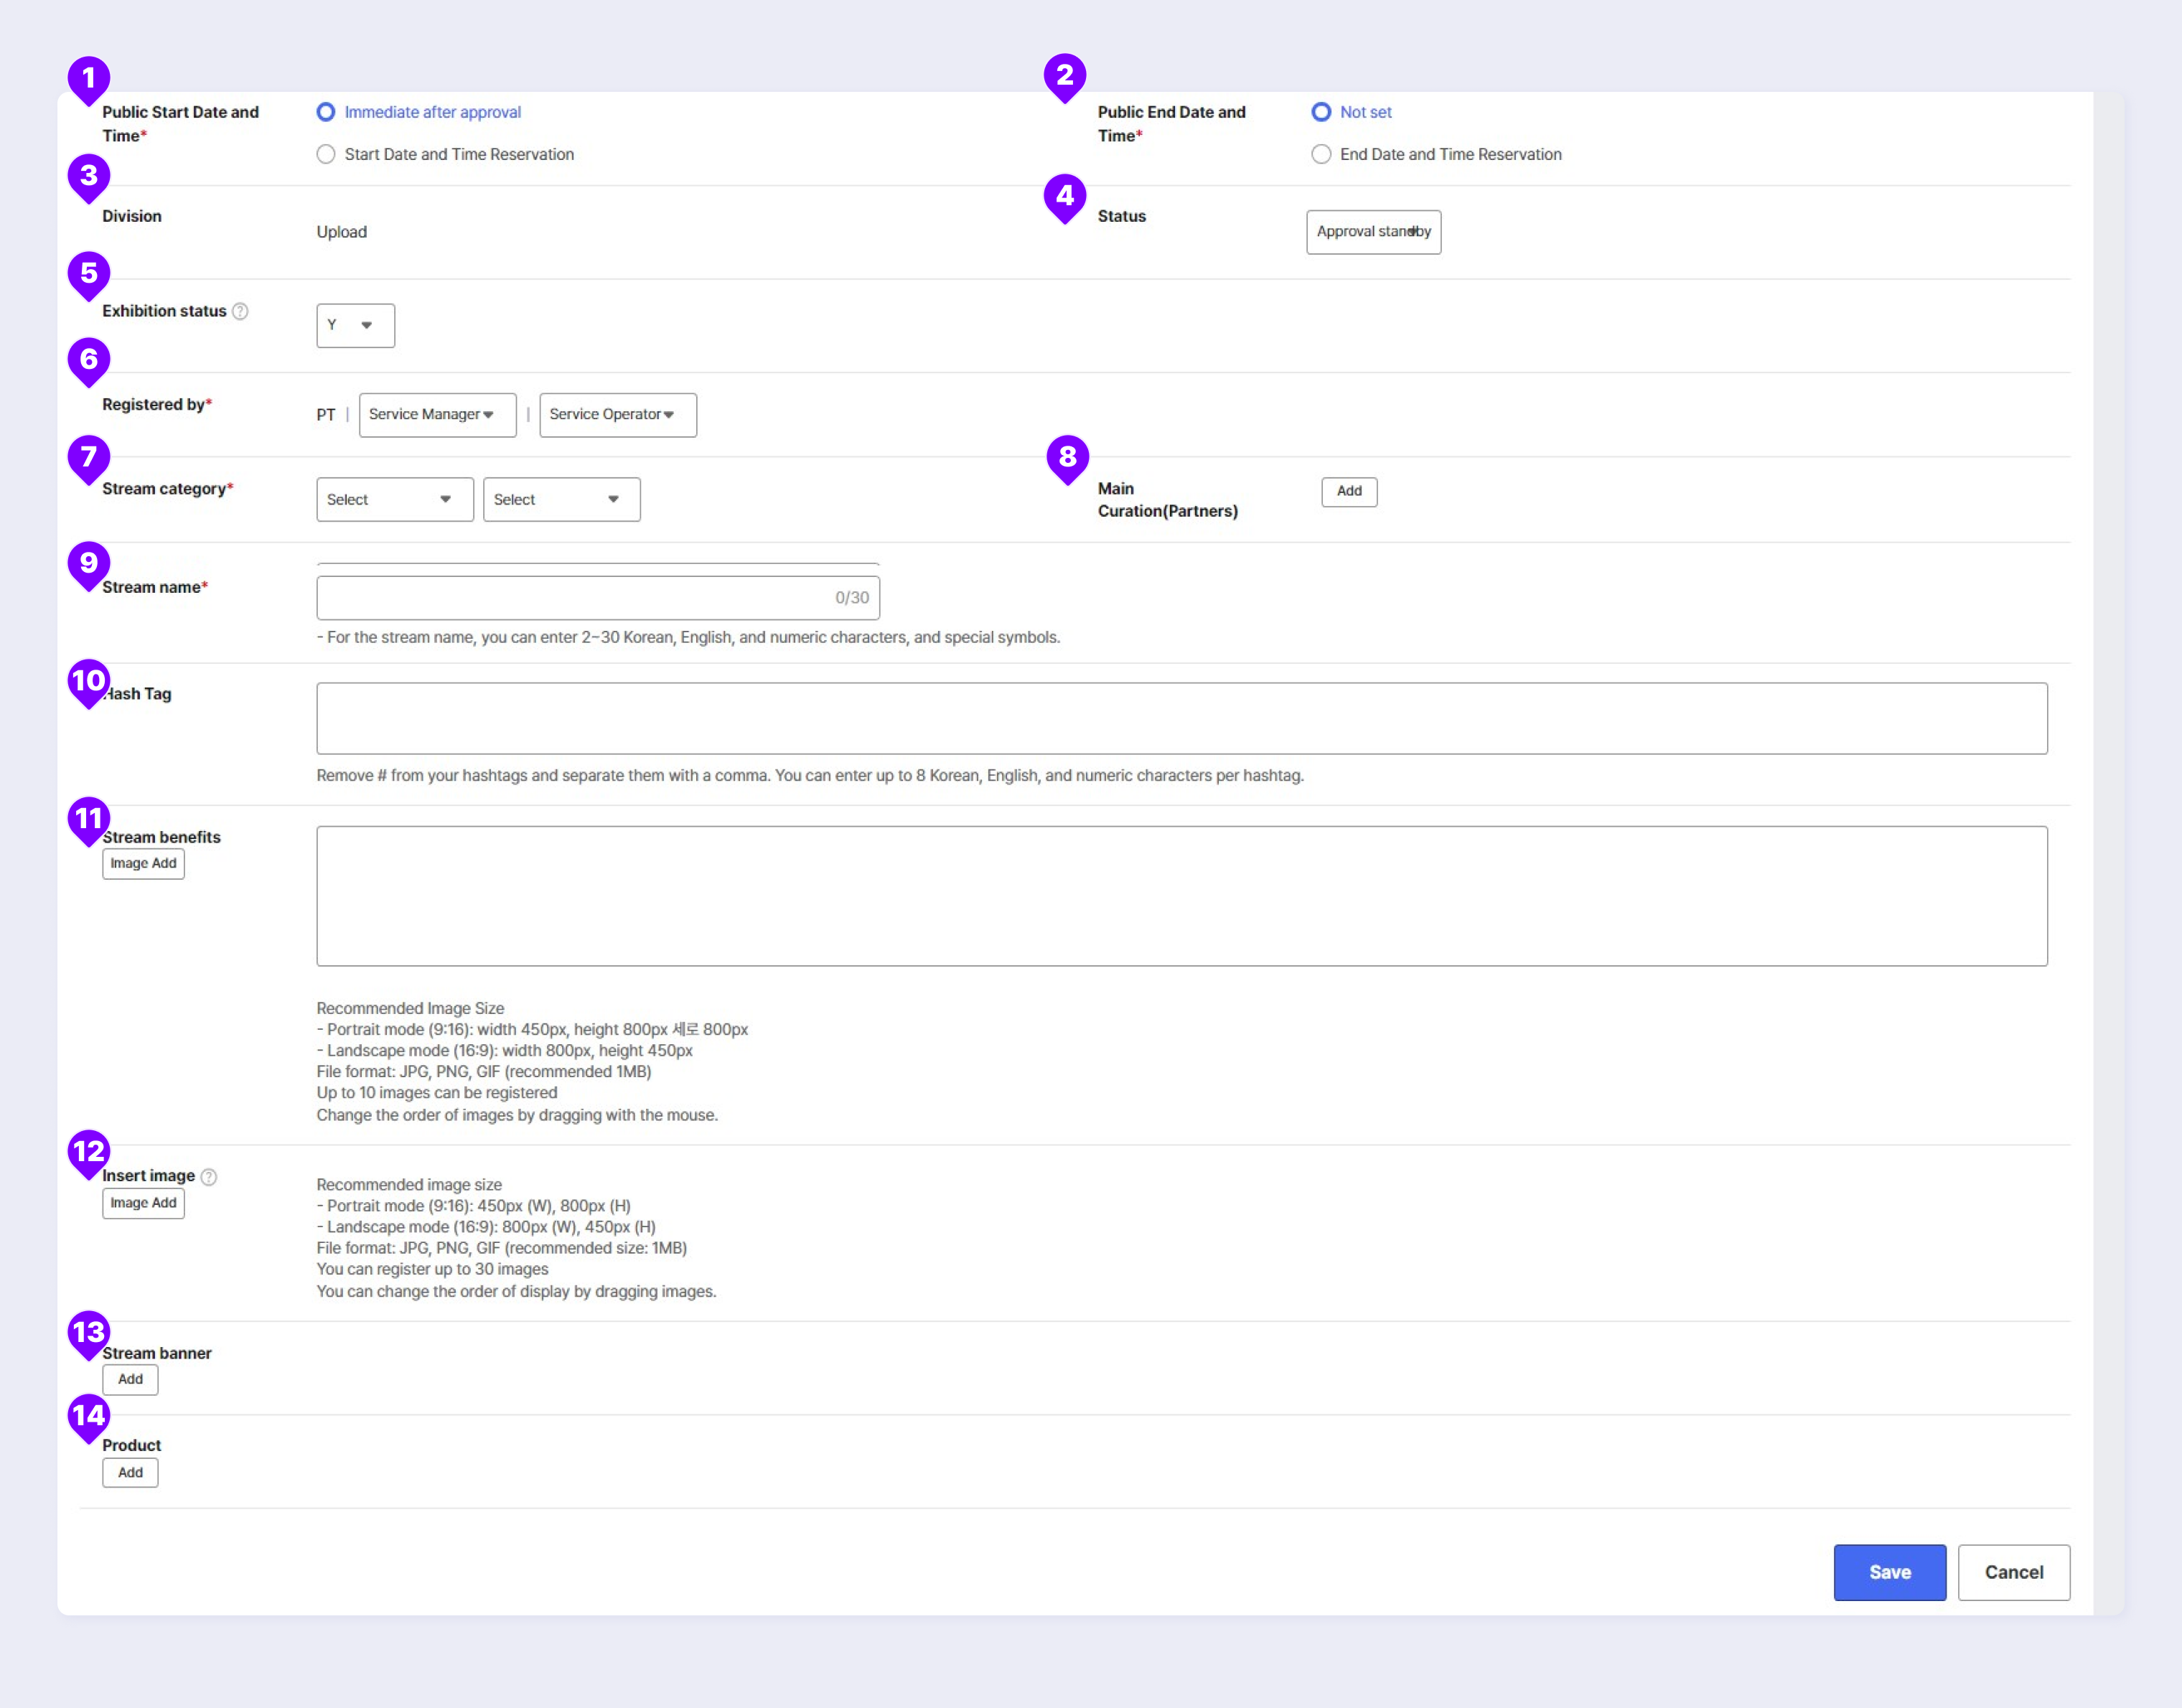
① Public Start Date and Time*
For newly registered Upload VOD, you can choose to release immediately after approval or at the set date and time.
- Immediately after approval: VOD goes public on the Collection Page immediately after it is approved.
- Start date and time reservation : Schedule the date and time for going public.
Start Date and Time for Public Release option is available only for Upload VOD. Replay VOD is automatically exhibited and this date and time cannot be changed.
② Public End Date and Time*
- Not set: Upload VOD is continuously on public release after it is registered. You can stop displaying using the End Public Release button.
- End date and time reservation: Automatically end the public release of the Upload VOD at the set date and time.
The public release date and time can be set to every hour.
③ Division
Classify and display the VOD type. It is shown as Upload if you directly uploaded it, and it is displayed as Replay if it is automatically converted after the livestream.
④ Status
You can set the approval status of the stream according to administrator permission: Awaiting approval, Rejected, and Approved.
- Service Administrator account: Can change the approval status of all Upload VODs registered by the Service Administrator (including oneself), Service Manager, and Service Operator.
- Service Manager account: Can change the approval status of Upload VODs registered by the Service Manager (including oneself) and Service Operator.
- Service Operator account: No permission to approve Upload VODs. The approval status can be changed by the parent account, including the Service Administrator and Service Manager.
⑤ Exhibition status
- Y(Public): Set Upload VODs in the client's Collection Page to public.
- N(Private): Set Upload VODs in the client's Collection Page to private.
⑥ Registered by*
This information is for setting and editing the person who registered VOD. Permission for viewing the registered Upload VODs varies by account.
- Service Administrator account: Can view the all Upload VOD list registered by the Service Administrator, Service Manager, and Service Operator.
- Service Manager account: Can view the Upload VOD list registered by the Service Manager and Service Operator.
- Service Operator account: Can view the Upload VOD list registered by oneself.
⑦ Stream Category*
The list registered by the super administrator (Mobidoo) is provided for the main category. For the subcategory, the Service Administrator can register and provide the list.
⑧ Main Curation
Set the curation list to include Upload VOD in the client's Collection Page.
⑨ Stream name*
Enter the title of the Upload VOD (up to 30 characters).
⑩ Hashtag
Enter hashtag information.
These are keywords that allow viewers to understand the content in Upload VOD. You can enter up to 8 characters and register up to 10 hashtags per content.
⑪ Stream benefits
Enter information related to VOD you want viewers to know. This information is shown on the Live Introduction tab of the Upload VOD.
⑫ Insert Image
Add images and videos to be shown in the Upload VOD.
⑬ Stream Banner
Add a banner to be shown in the Upload VOD screen. You can set the link and display time.
⑭ Product
Add a product to the Upload VOD screen. Click the Add button to add a product.
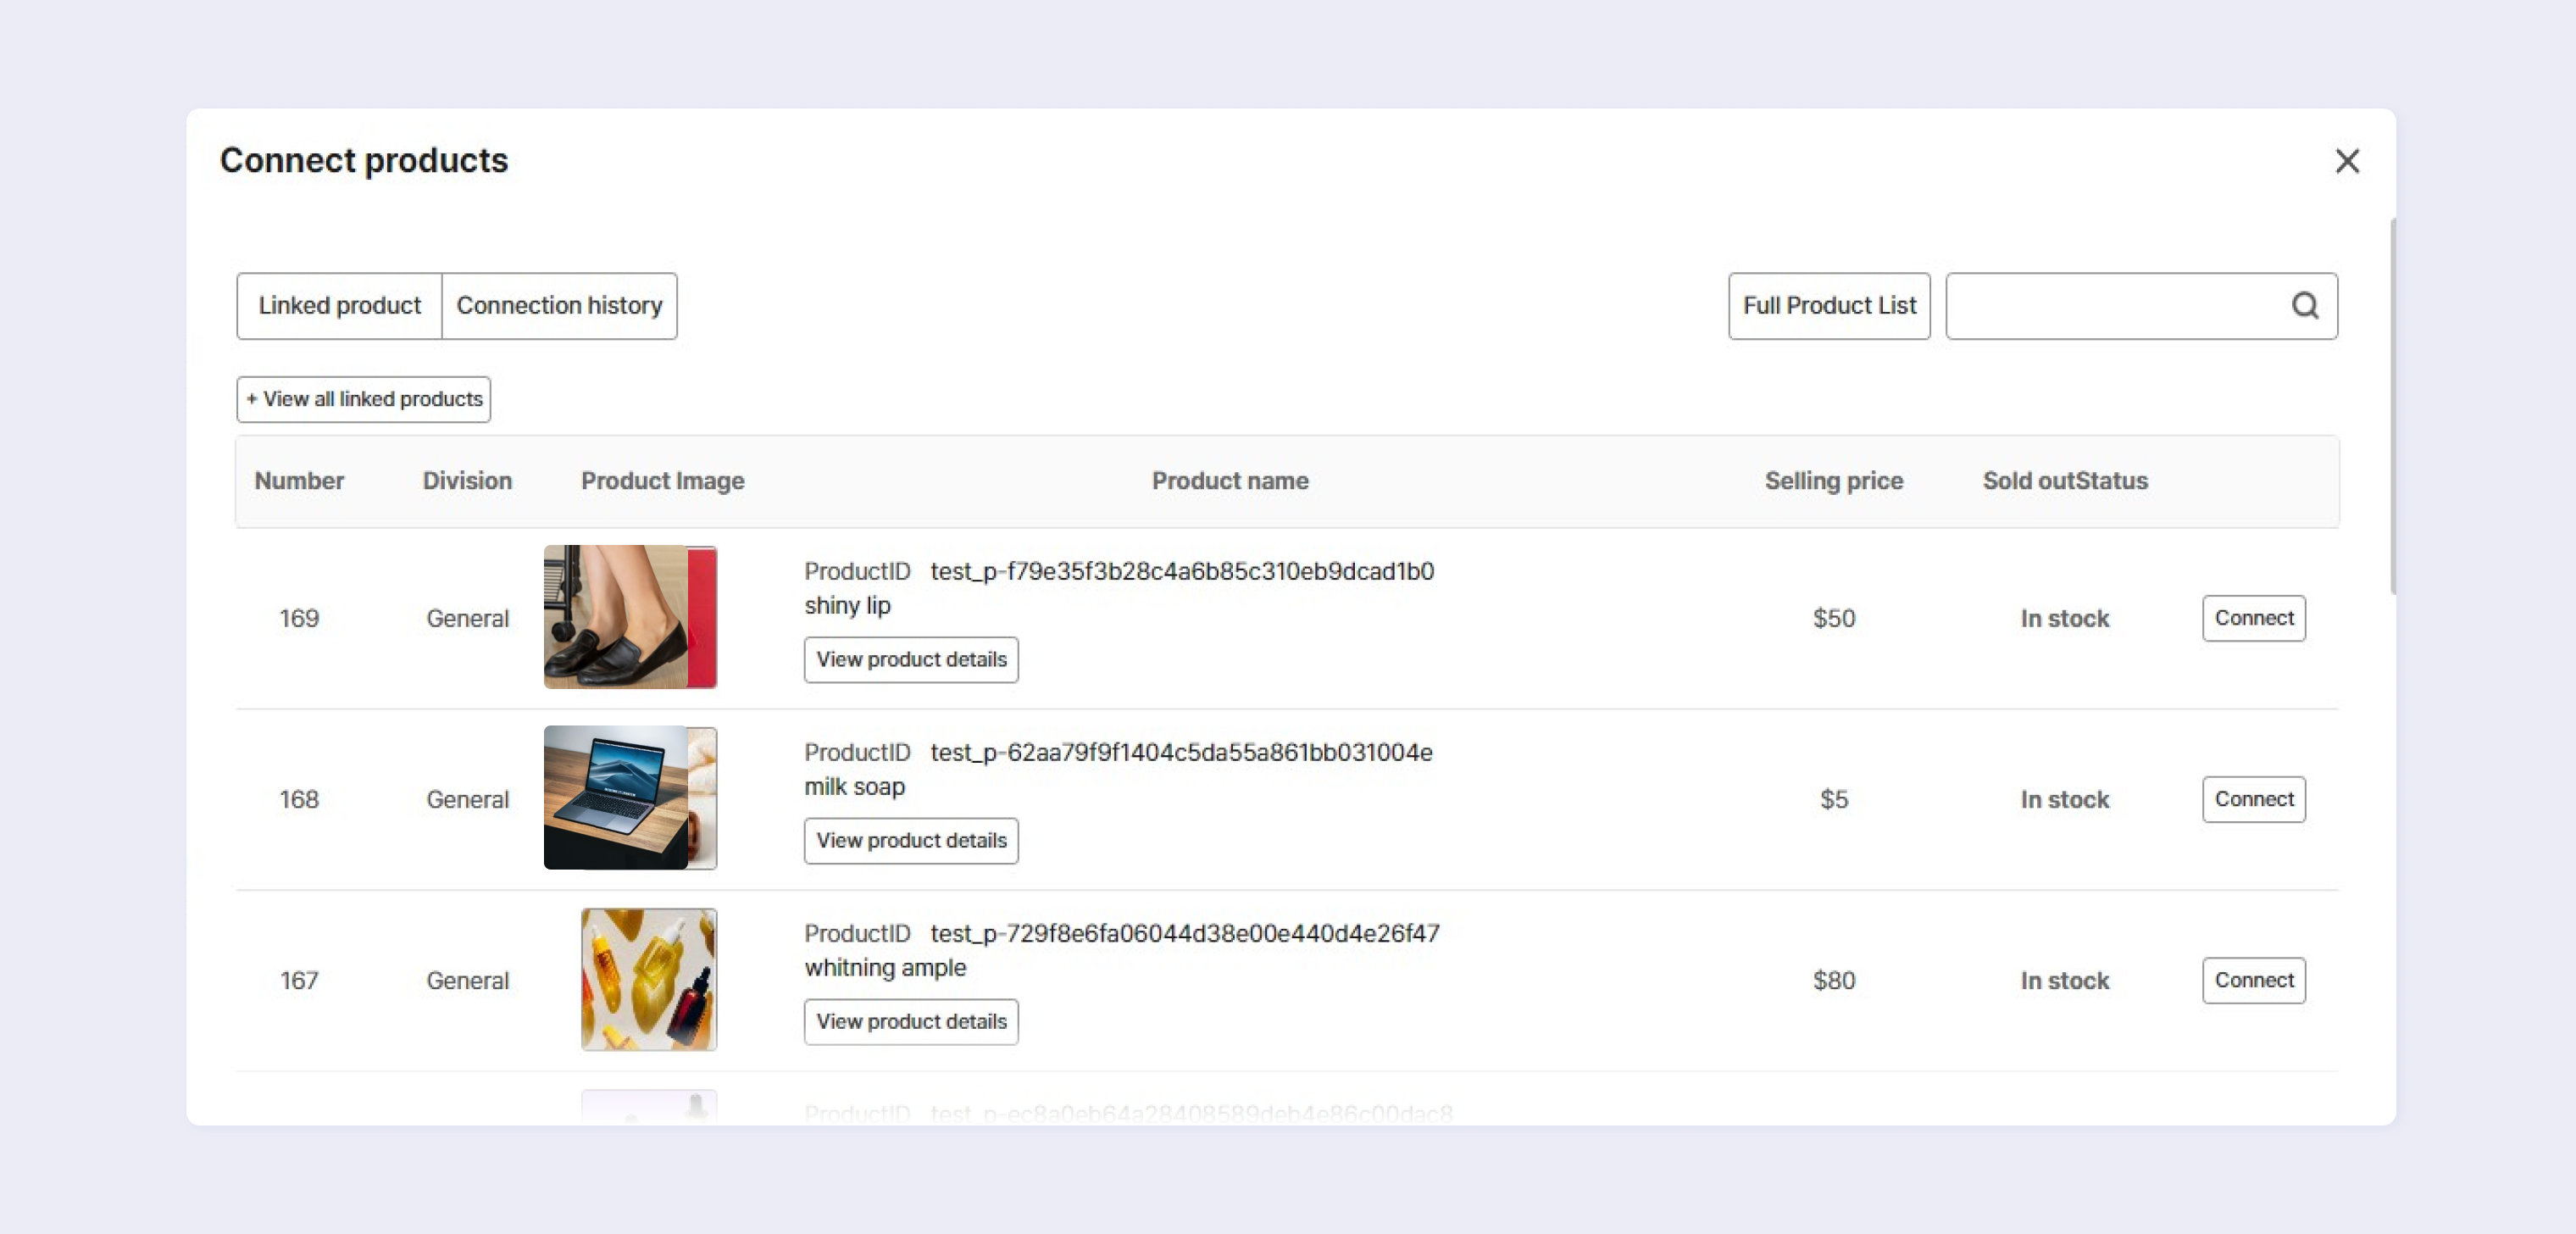
STEP 1. You can search the list of products registered in the product menu using the Product List button.
STEP 2. If you click the Add button in the list shown, the product is added to the product list.
STEP 3. There is no separate Save button. Click X to apply the change.
You can change the product order by dragging ☰ on the right. Products are shown to viewers in the order of list.
Approving
To register Upload VOD, a user with permission needs to approve it. Log in to Saucelive Admin with the administrator account and proceed with the approval process in the Content > VOD menu as follows.
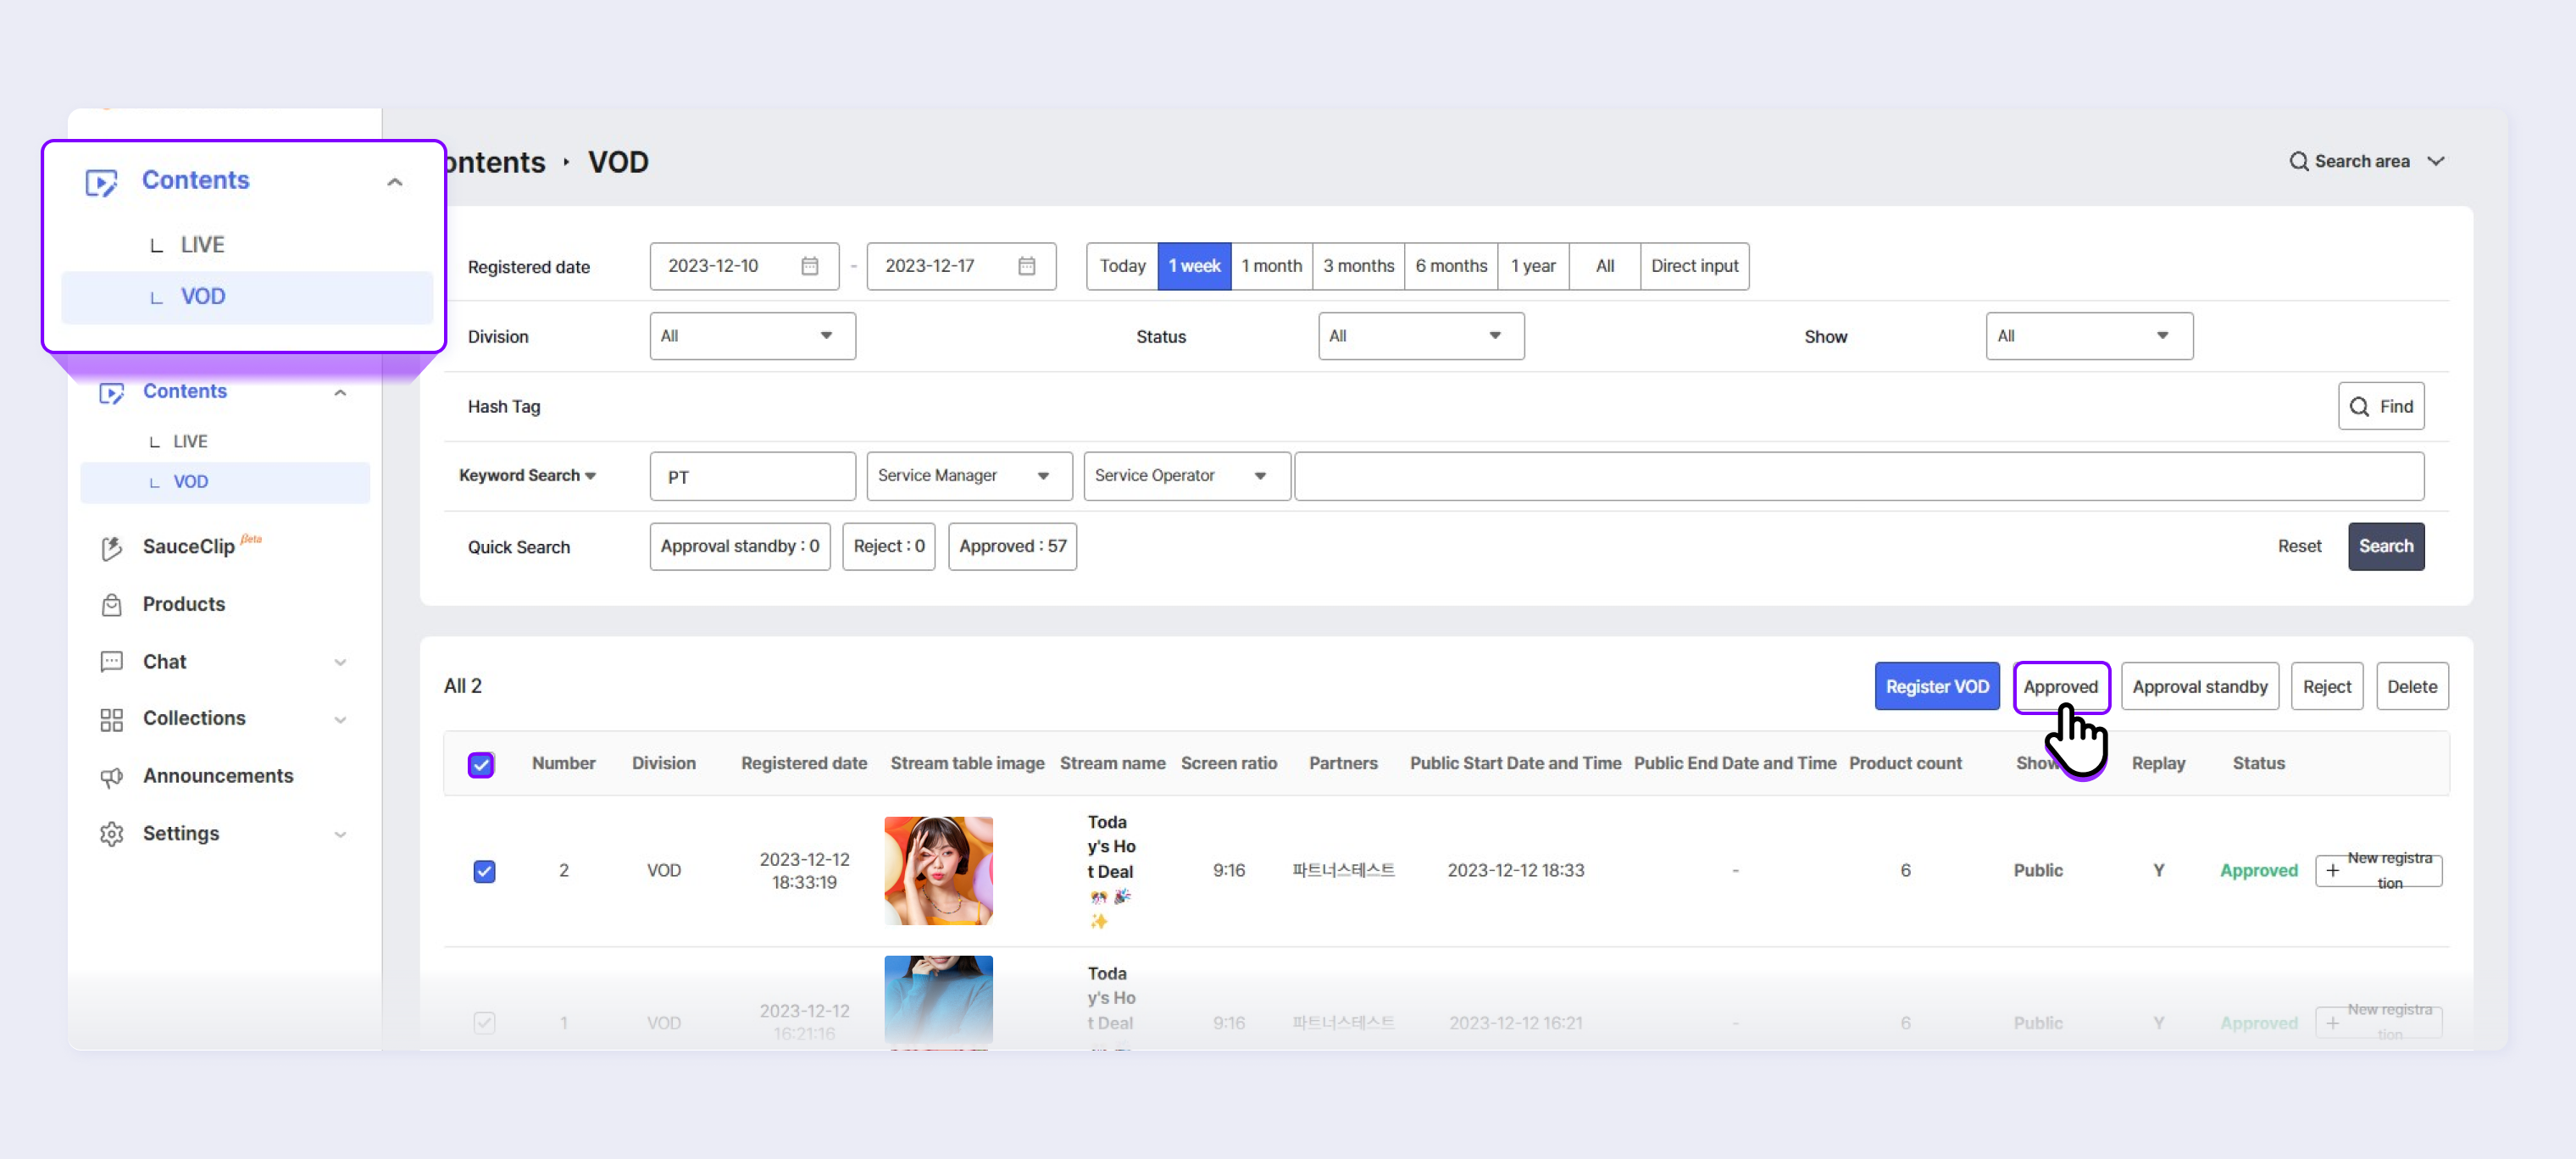
STEP 1. Check the registered VODs and select the checkbox of the VOD to approve.
STEP 2. Click the Approve button at the top.