
Liveconsole Configuration
Getting Started with Liveconsole
After creating a livestream in the Saucelive Admin site, click the Liveconsole icon to manage the livestream in a new window. There are many other ways to run Liveconsole.
- Click the Liveconsole button of the livestream you want in Saucelive Admin > Content > Livestream > List.
- If you are on air, click the Liveconsole button in the quick menu, Real-time Livestreams.
Liveconsole Layout
Liveconsole is divided into 5 areas, and the layout can be changed through settings.
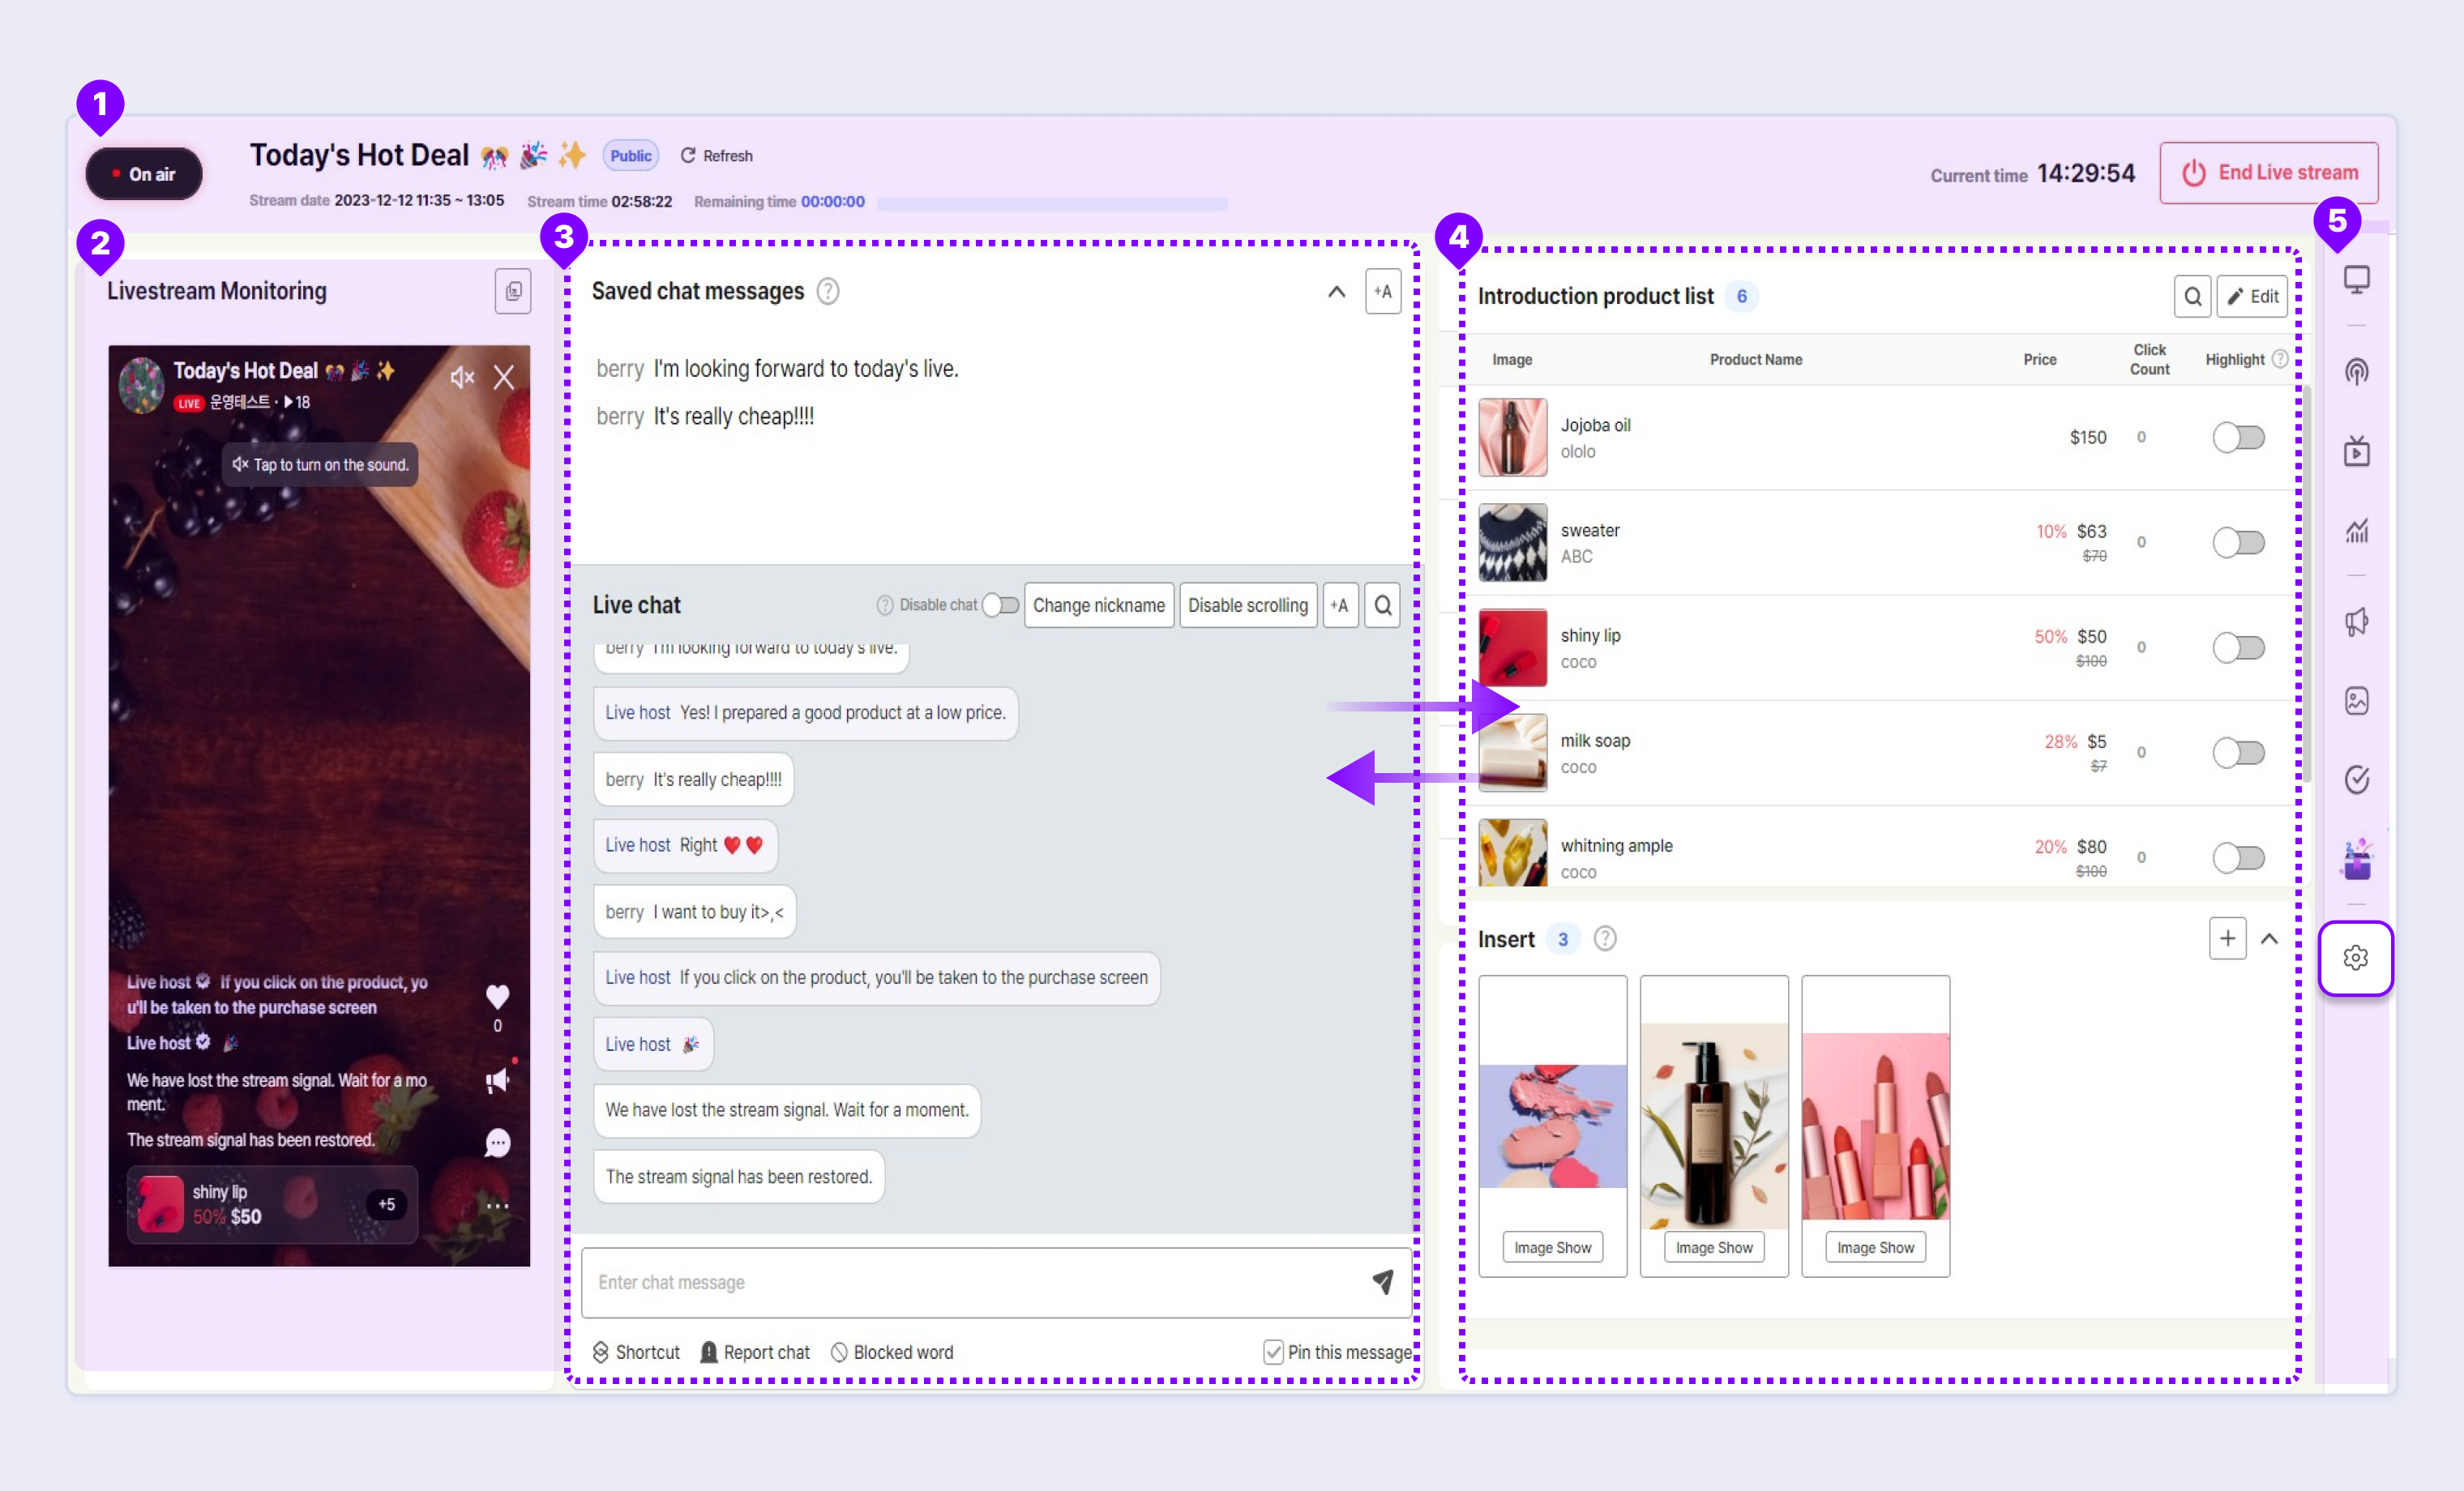
① Status Information Area: This area displays basic information, such as date and time, livestream status, and livestream type.
② Player Area: This area is the actual player screen visible to viewers.
③ Chat Area: You can see viewers' chats and use administrator chat. You can also use the chat archive. The Chat Archive area can be collapsed or expanded as needed using the Collapse button.
④ Product/Insert Area: This area displays the list of products to be sold on the livestream. On the bottom, there is a list of images or videos to be displayed as Insert. You can collapse or expand the Insert area using the Collapse button.
⑤ Side Bar: You can set and view various additional functions, such as Go to Prompter, Streaming Information, Livestream Information, Statistics, Banner, Purchase Event, and Layout Settings.
- ① Status Information Area and ⑤ Side Bar Area are pinned, and the position of ② Player Area, ③ Chat Area, and ④ Product and Insert Image/Video Area can be changed through Layout Settings in Side Bar > Settings.
- Select the layout you want in Side Bar > Settings > Layout Settings and save.
The layout settings of Liveconsole and Prompter are saved by account, and the current settings are maintained until reloaded.
Liveconsole Components
Liveconsole is configured as below.
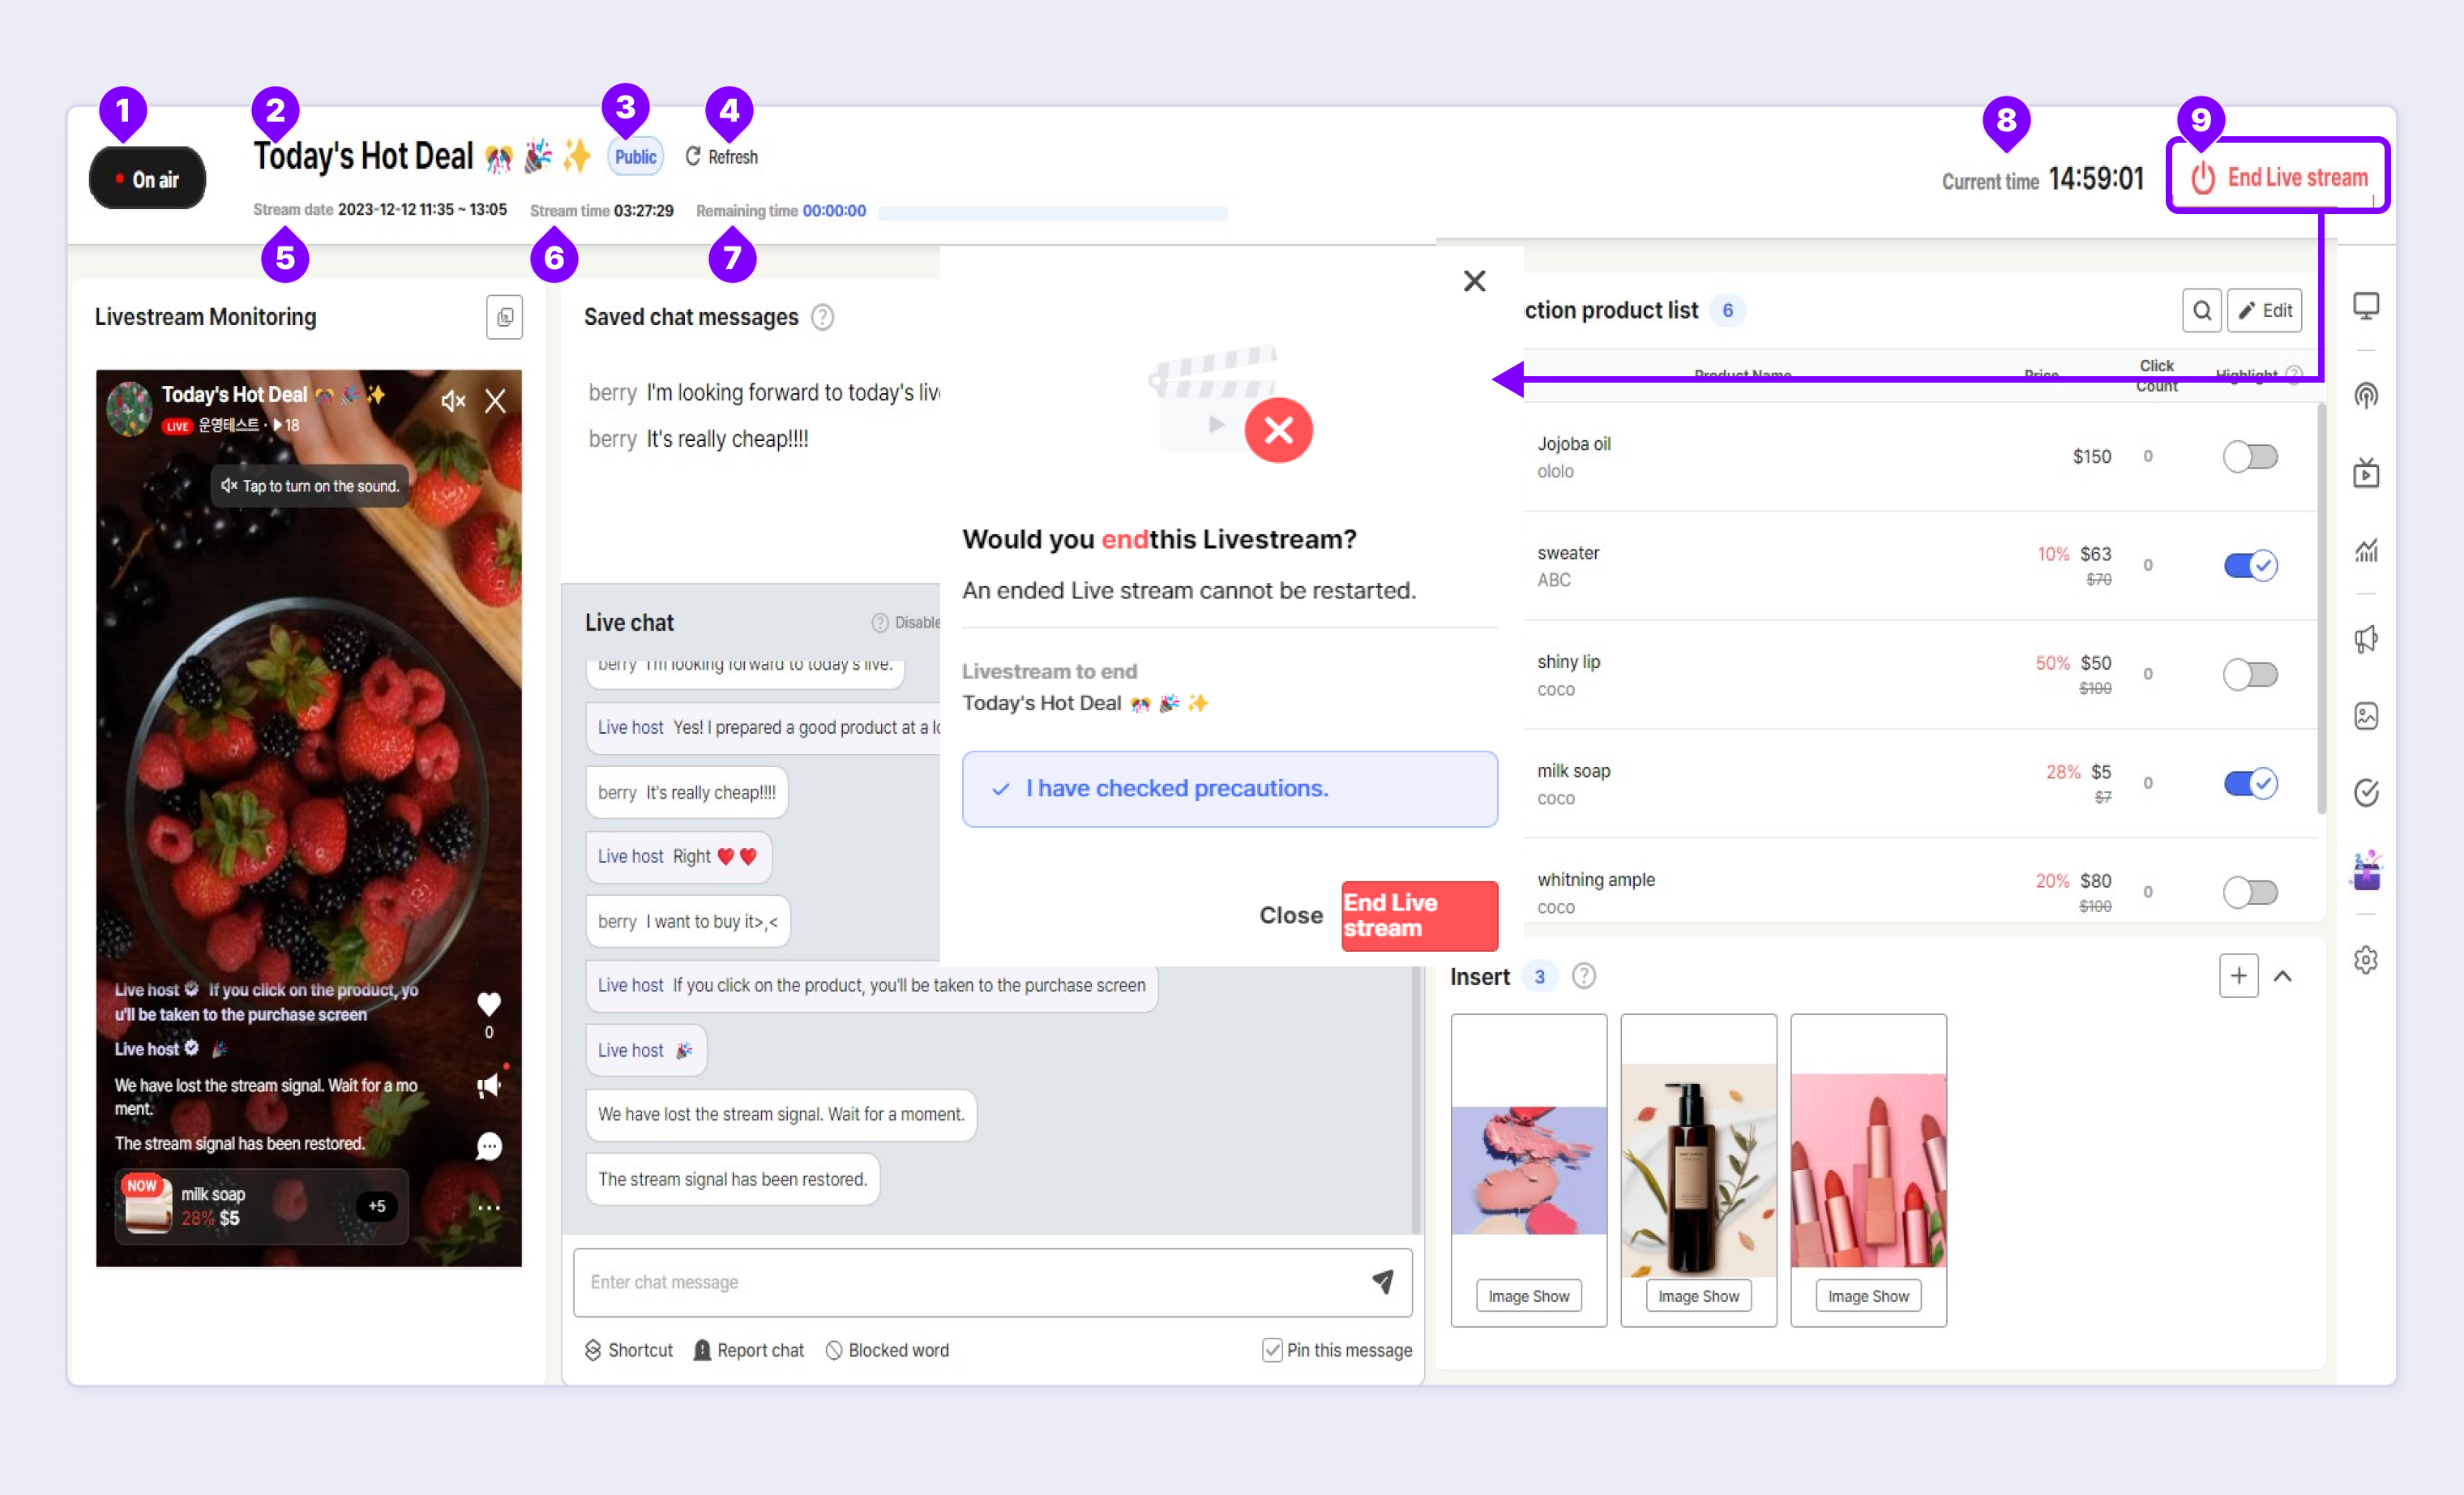
① Livestream Status
You can check the status of livestream in Liveconsole. It is displayed as "Preparing" before the livestream starts, "On Air" while on air, and "Ended" after the livestream ends.
② Title
The title that was entered when scheduling is displayed, and up to 30 characters can be entered.
③ Livestream Type
Displays the General/Secret, Test/Main stream status.
④ Reload
When clicked, the screen is reloaded and changes are reflected.
⑤ Livestream Schedule
Displays the time when livestream will be hosted.
⑥ Live Duration
Different times are displayed according to the livestream status.
- When preparing livestream: The remaining time until the livestream is displayed.
- When the livestream is on air: The time elapsed since the start of the livestream is displayed.
- When the livestream ended: The time when the livestream actually started and ended is displayed.
⑦ Remaining time
Displays the remaining time in relation to the scheduled live time. This area turns private after the livestream ends.
⑧ Current Time
Displays the current time, allowing you to easily check the time while on air.
⑨ End Livestream
- When preparing livestream: The Cancel Livestream button is activated only for the Super Administrator and Service Administrator.
Click Confirm to cancel the livestream in preparation. Keep in mind that you cannot restart the livestream with the same stream table.
- When the livestream is on air: When clicked, shows a pop-up window saying "Do you want to end a Livestream?". The pop-up window displays the title of the livestream, and you can select Close or End Livestream after checking on the precautions message.
Keep in mind that you cannot restart the livestream with the same stream table when the livestream has ended.
- When the livestream ended: The End Livestream button is deactivated.